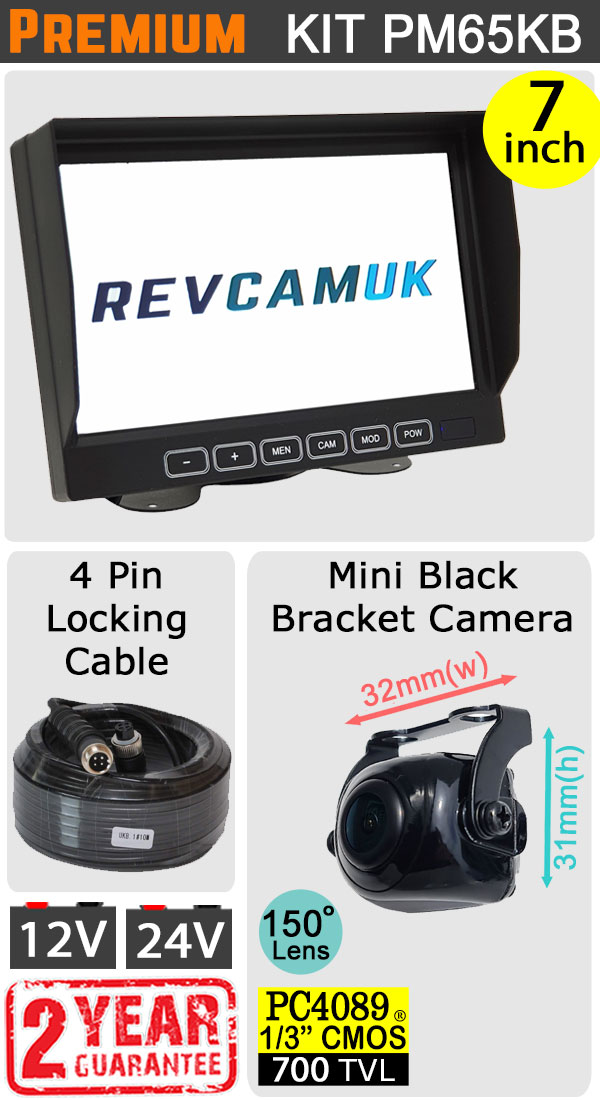
7" Dash Monitor + Mini Black Bracket Reversing Camera Kit - PM65KB

Price

£166.00

VAT Included £27.67
Availability IN STOCK
Product Code: KIT-PM65KB
Cable Length
Add extra monitor bracket?
Add a lighter plug?
Add a fuse tap?
Quantity
(from 1 to 40)

If you'd like this by

Order within ::

(Please select Next Day Delivery Option - Mainland UK only) Terms Apply

Description

About the 7 inch dash monitor and mini black reverse camera kit

  • This reversing camera kit comprises of a mini black bracket reverse camera. Plus a top quality high resolution dash monitor.
  • This dash monitor uses a high quality 7 inch LCD digital panel, that gives great colour and brightness.
  • This reversing camera uses a top quality PC4089 700TVL image sensor, combined with the all glass composite lenses (the same as we use with our brake light cameras), that we had the same factory make these reversing cameras with the same setup.
  • The PC4089 sensor is one of the new generation of CMOS, which costs less to produce than CCD, but still has very good performance. We are then able to pass along the savings to you.
  • The camera is fitted with a very wide angle lens, to be able to easily see all around the rear of the vehicle.

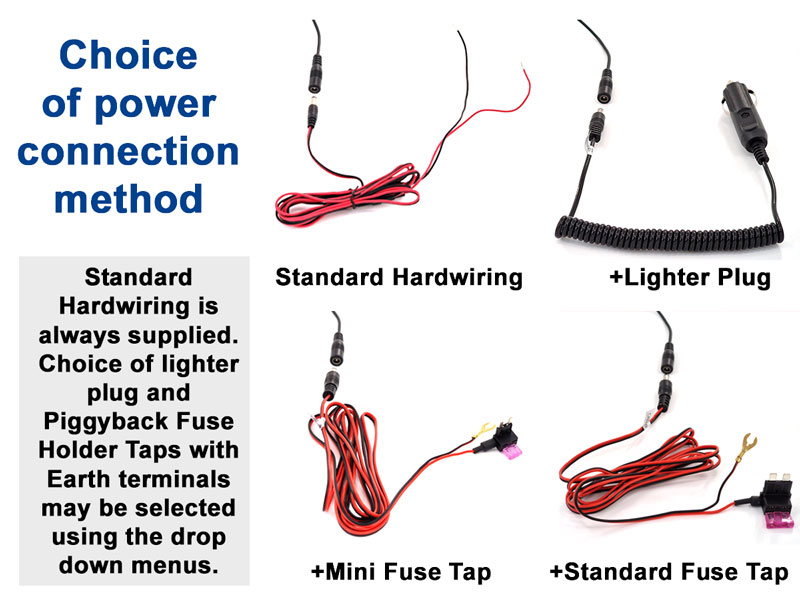
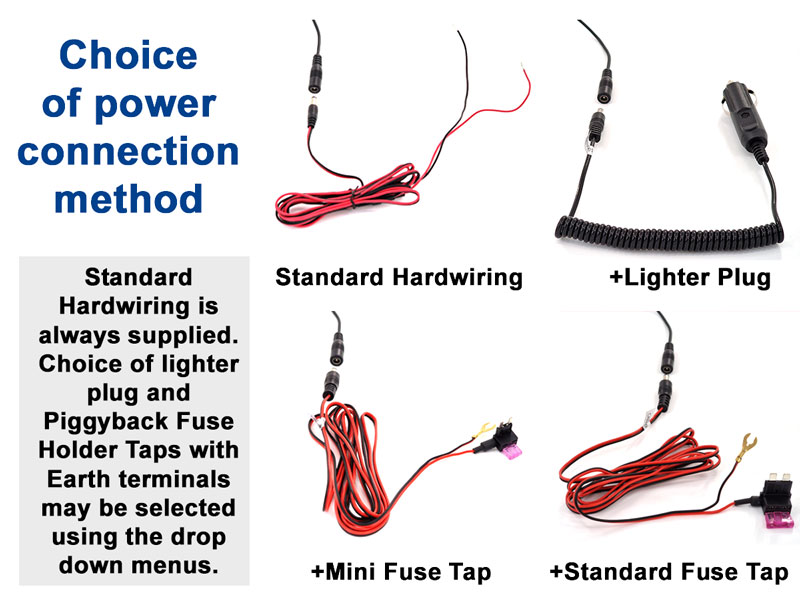
Choice of kit power options

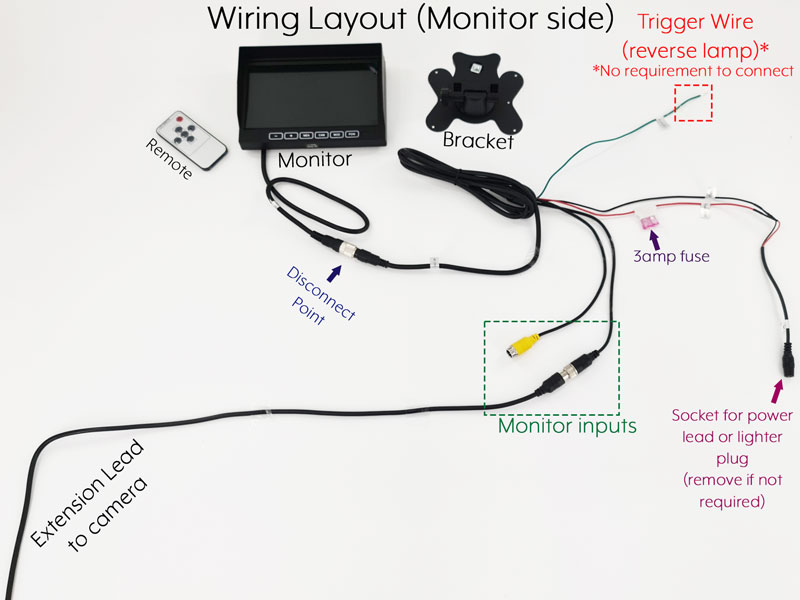
  • On the monitor wiring harness is a 2.1mm DC socket. On the drop down menu of this product, you can select your desired power lead to plug in to this.
  • The standard hardwiring is supplied with all options, this terminates in a red wire (+12V/+24V), and black wire (earth).
  • For the ultimate quick install is a lighter plug option. Some people also order this just for the initial setup, before changing to the standard hardwiring/fuse tap.
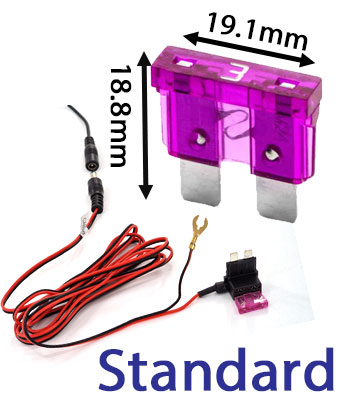
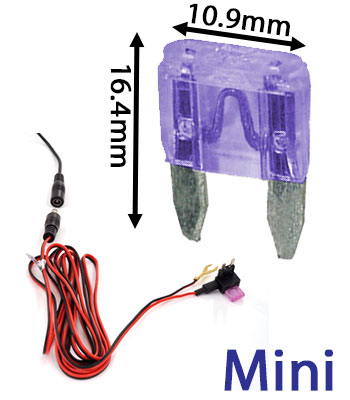
  • Fuse taps aka piggyback fuse holders, are the most recent addition to our options. This allows you to "piggyback" off an existing circuit from your fuse box. The most common size fuse found in modern vehicles is the mini blade (size = 10.9mm wide x 16.4mm tall), older vehicles are likely to have the standard blade (size = 19.1mm wide x 18.8mm tall). Download and read our Fuse Tap installation instructions PDF for more information.
  • Our fuse taps were designed by us, they have a 200cm lead that connects directly to the monitor socket with no soldering / crimping required. There is a black wire with an earth terminal attached - designed to fix to a chassis bolt/screw.  This earth wire/terminal can be separated away from the red wire to enable you to find the most convenient ground/earth (although often this is next to the fuse box).
Power Supply Options including lighter plug and piggyback fuse taps

Additional monitor bracket/mount options

We can supply a discounted additional mount/bracket for the monitor when ordered at the same time as the kit.  Please see the photo below, and make your selection using the drop down menu above the add to cart button.
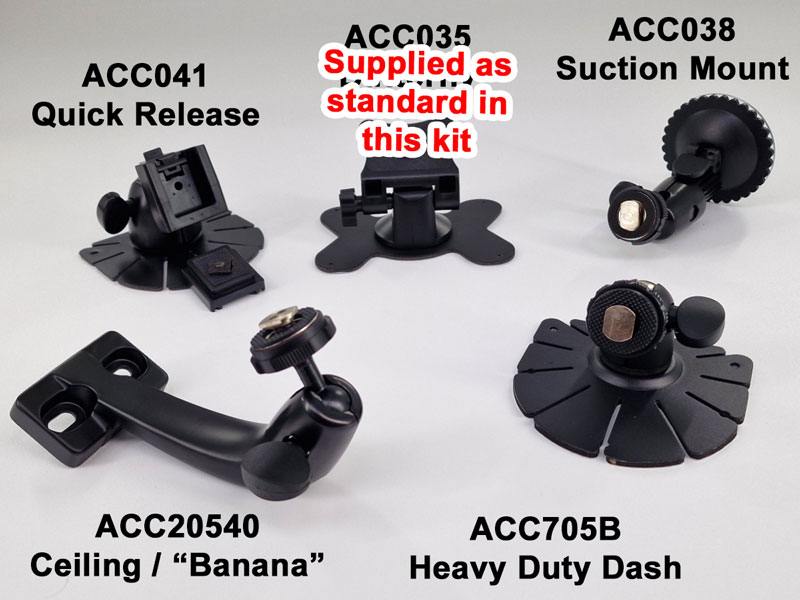
See our video below for details about the brackets in the photo above.


Easy-Fit Wiring

  • We have been using this type of cabling since 2007, and it has performed perfectly in all of this time. It is called the 4 pin aviation cable, and uses what is known as a 4 pin GX12 connector.
  • This type of connector is very durable, and can be kept outside exposed to rain and freezing temperatures.
  • It makes fitting easier, and avoids CANBUS issues due to the monitor powering the camera.
  • It keeps contacts clean and dry, plus prevents them from accidental separation.
  • It has become the industry standard connector, which means you aren't forced to buy future cameras/cables/upgrades from one retailer - as parts are interchangeable between numerous suppliers (although we are confident you will be impressed enough with us that you will choose us for any future upgrades/spare parts).
  • All of our aviation extension cables are high quality, with the inner cores consisting of pure copper. We do not use the cheaper CCA (Copper Coated Aluminium) or CCS (Copper Coated Steel) cables, because they are more prone to failure/degradation over time.

2 Year Guarantee

We supply with a 2 year Guarantee with us, meaning we will repair or replace any non-user damaged parts that are deemed faulty.  Our failure rate is very low even beyond these two years, if you have a problem outside of 2 years we should still have compatible parts and possible repairs for reasonable amounts.


Parts Tested in the UK

The parts of this kit will have been tested twice, once by the factory and once by us.  We check all the items in the kit including all cables, trigger wires, IR leds and menu functions to reduce any chance of having a non working part.  Our fault rate is extremely low, and we just like to ensure that we avoid any imperfection slipping past.  This is why professional fitters love us.  


Optional Guidelines displayed when reverse selected

If you want to see the guidelines you can turn these on and off in the menu and even change the location of the guidelines and the numbers, plus change the display from ft to M.  The guidelines will only work on the reversing channel and when the trigger wire for this channel is active.  It won't bother you when driving forward and wanting to view the camera on all the time.

FAQ'S

Yes you can. As this is a small camera, we have the power stabiliser placed on the cable to aid heat dissipation.  This means that the camera is suitable for running all the time whilst driving.

Rough guide:

  • 5M is good for an average size car
  • 7.5M is good for large cars and shorter wheelbase vans
  • 10M is good for a medium length van (around 6M)
  • 12.5M is good for most vehicles up to around 8.5M long (covers most motorhomes except the super long)
  • 15M is good for vehicles up to around 10/11M eg rigid lorry, small coach.
  • 20M is good for super long vehicles

Our easy wire fuse tap options are new for 2023.  We designed a fuse tap that plugs in to a socket that is present on all of our monitor wiring harnesses.  The other side has a "piggyback" fuse holder aka fuse tap.  You identify a fuse in the fuse box that comes on/off with the ignition (see piggyback fuse holder / fuse tap instructions here - PDF download).  The original fuse is placed in to the new fuse tap, plus there is a new fuse already present for the reverse camera kit.  On the same wiring there is an earth terminal connector, simply attach this to a chassis bolt (usually near the fuse box, or add your own).
Detailed Images

Instructions for fitting our 4 pin based reversing camera kits


Manual for operation of the 7" dashboard mounted monitor supplied in this kit

instructions for our 7 inch dash mount monitor for rear view and reversing cameras

Monitor

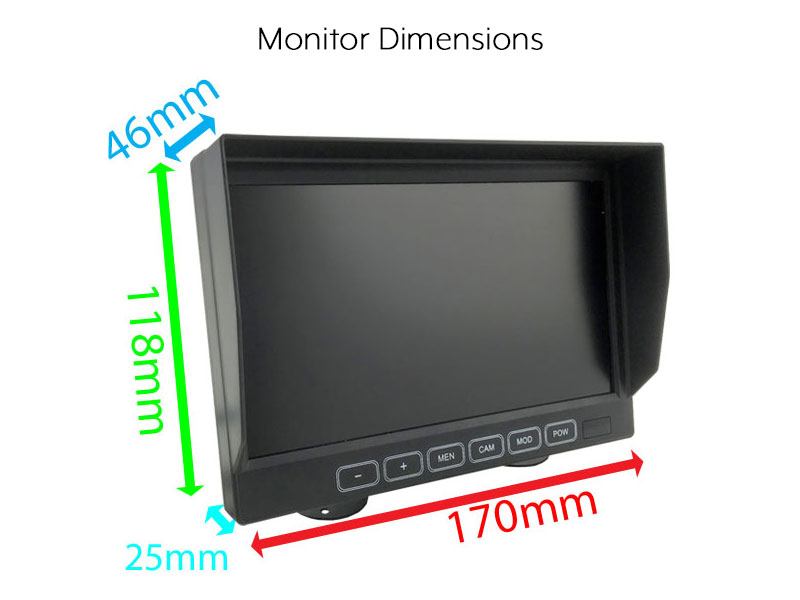
7” Colour LCD screen
Audio Output: 0.5W
Loudspeaker: one 15x40mm round loudspeaker
Power supply: 12V/24V
Power Consumption: 4W Max
Digital Screen Resolution: 800 x3(RGB)x480
Contrast: 500:1
Brightness: 400cd/m2
Viewing Angle: U: 50 degrees/ D: 60 degrees, R/L: 70 degrees
Operating Temperature: -10C to +65C
Storage Temperature: -30C to +80C RH90%
2 Inputs
PAL/NTSC/AUTO
Mirror/Normal Switch on both channels
Full function Remote Control

Camera

Image device:- PC4089 CMOS sensor
Effective pixels: 976(H) x 592(V)
Resolution: 700 TVL
Selectable guidelines
PAL format
IP rating: Ip68
Lens angle: 150° diagonal
Minimum illumination 0.1 Lux
Video output: 1.0VP-P.75Ohm
Power supply: DC12V
Operating Temperature: -20°C to +70°C